Wednesday, December 3, 2014

Sustainable Agriculture Activity Guides

http://studentfarm.ucdavis.edu/edumat/saguides

Nitrogen fixation is the natural process, either biological or abiotic, by which nitrogen (N2) in the atmosphere is converted into ammonia (NH3).[1] This process is essential for life because fixed nitrogen is required to biosynthesize the basic building blocks of life, e.g., nucleotides for DNA and RNA and amino acids for proteins. Nitrogen fixation also refers to other abiological conversions of nitrogen, such as its conversion to nitrogen dioxide.
Nitrogen fixation is utilized by numerous prokaryotes, including bacteria, actinobacteria, and certain types of anaerobic bacteria. Microorganisms that fix nitrogen are called diazotrophs. Some higher plants, and some animals (termites), have formed associations (symbioses) with diazotrophs. Nitrogen fixation also occurs as a result of non-biological processes. These include lightning, industrially through the Haber-Bosch Process, and combustion.[2] Biological nitrogen fixation was discovered by the Dutch microbiologist Martinus Beijerinck.


 TEST:

http://www.bbc.co.uk/bitesize/quiz/q56103256

Nitrogen cycle

Grow Your Own Fertilizer

Cover crops have many potential benefits in agriculture. They can improve numerous soil physical, chemical, and biological characteristics, improve water retention and utilization, reduce erosion, control weeds, enhance biological control of pests and help manage crop nutrients, particularly nitrogen.
Nitrogen is a primary plant nutrient that is an important factor in determining a crop’s health and productivity. However, it can also be a financially and environmentally costly farming/gardening input. Synthetic nitrogen fertilizers can play a significant role in polluting our water and air resources, while also consuming a great deal of fossil fuel energy in their production and transportation to the farm. Cover crops can play an effective role in reducing the need for synthetic nitrogen fertilizers.
The goal of this activity is to introduce the idea that nitrogen can be produced and conserved on a farm biologically through the use of cover crops. In order to make good use of a cover crop in a farm’s nutrient management strategy, one needs to estimate how much nitrogen a mature cover crop contains. This estimate can then provide an approximate figure of how much nitrogen the cover crop will supply the soil reserve and
next season’s crop. The following reference resources are provided to improve your familiarity with the topic.
Resource References
Nitrogen Cycle. Kimball's Biology Pages, John W. Kimball
http://users.rcn.com/jkimball.ma.ultranet/BiologyPages/N/NitrogenCycle.html
Cover Crop Resource Page. UC Sustainable Agriculture Research and Education
Program (SAREP)
http://www.sarep.ucdavis.edu/ccrop/
Cover Crops for California Agriculture. Miller, P. R., W. L. Graves, et al. 1989.
University of California, DANR Publication 21471, Oakland CA

Introduction
Crops generally require more nitrogen than any other nutrient, usually between 80 and
200 lbs of nitrogen per acre. Encouraging nitrogen fixation via the mutualistic
relationship between legumes and associated Rhizobia bacteria is one of the most
important ways farmers can add nitrogen to the soil in sustainable farming systems.
However, it is important for farmers to know the amount of nitrogen that such a cover
crop contains and may supply to a subsequent crop. In this exercise, participants will
estimate the nitrogen content of a legume cover crop. They will harvest and weigh all of
the above ground biomass of a cover crop from a number of sample sites in the field.
These weights will then be used to estimate the amount of nitrogen in the cover crop.
Such information can be used by a farmer to help make decisions about when to mow
and/or turn a cover crop into the soil or how much additional nitrogen may need to be
supplied to the crop from other sources.

To Lead This Activity You Need to Know
• cover cropping
• the nitrogen cycle and its relationship to soil fertility management
• biological nitrogen fixation
• nitrogen requirements for common crops


Key Concepts
• nutrient cycles
• plant nutrition
• mutualism
• nitrogen fixation
• cover crop
• biomass
Objectives
• Engage participants in assessing the nitrogen contributing performance of a cover crop.
• Introduce the concept of mutualistic relationships in the context of agriculture.
• Demonstrate the economic and ecological benefits of biologically managed soil fertility.

Materials
• 3 ft x 3 ft (or for metric measurements, 1 meter x 1 meter) square quadrats, made
from wood, PVC pipe or similar material (1 per team of 3 – 4 students)
• hedge shears (1 - 2 shears per team)
• burlap or woven fabric bags and a method to label them (2 – 3 per team)
One of each per class:
• a scale or balance with the ability to measure full bags weighing 20 - 30 lb (or10-
15 kg) (note: if measuring a sample from an intercrop of legumes and grasses,
and the primary scale can not make measurements less than 1 pound, a second,
more sensitive scale is necessary)
• conversion factor chart (included below)
• calculator
Activity (45-50 minutes)
(The instructions and examples below use English units; however this exercise can be done using metric measurements; the appropriate information and conversion factors are provided in both English and metric units in the tables.)
1. Before starting the activity discuss the nitrogen cycle, nitrogen fixation, and the concept of mutualism.
2. Arrange teams of 3-4 students per team.
3. Have them weigh and record the weights of their empty bags.
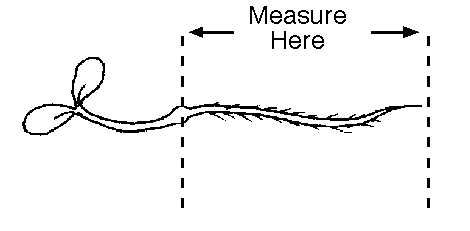
4. Demonstrate how to enter the cover crop field and place the quadrat so that you can sample all of the above ground plant material from the space being sampled.
5. Have each team choose a sample site in the field, place their quadrats at their sample sites and use their hedge shears to cut and remove all of the above-ground plant matter.
6. Label the bag(s) with the name of the team taking the sample and the type of cover crop being sampled.
7. Have each team weigh their bags and record the weights on the student worksheet.
8. Use Table 1  to determine the appropriate cover crop conversion factor based on type of cover crop being sampled. Multiply the cover crop sample weight by the conversion factor to arrive at the total amount of nitrogen in the cover crop.
Discussion and Reflection
1. Select a common vegetable crop they would like to grow on the cover crop field in the next growing season (Table 3. of Student Worksheet).
2. From the table, identify the nitrogen needs of each selected vegetable crop.
3. Calculate how much nitrogen the cover crop could provide each selected crop as a percentage of that vegetable’s nitrogen needs (Table 4. of Student Worksheet).
Based on the above, encourage the students to consider the broad economic value of the cover crop providing biologically generated on-site fertilizer.

Student Worksheet
Estimate the nitrogen contribution of a cover crop by using the weight of your biomass sample. Answer questions A,B,C,D, and E.
A. What is the weight of your cover crop biomass sample? ________ lb or kg (circle one)
B. What is the conversion factor for your particular cover crop? _______ (see Table 1.)


Table 1. Cover Crop Conversion Factors from Wet Weight to Nitrogen Content
                   Cover Crop Conversion Factor (Metric kg/hectares)
Vetch: Lana (Wooly Pod) or Purple 28 59
Bell Bean 18 37
Berseem Clover 23 48
Blackeyed pea (Cowpea) 21 44
Grass (average) 11 23
Legumes (average) 23 40
C. What is the estimated total amount of nitrogen contributed by the cover crop to the soil
for the next season?

________________________ X __________________ = ______________________ kg/hectare
Cover Crop                                  Cover Crop                       Nitrogen Contribution
Sample Weight                            Conversion Factor                     by Cover Crop


If you were to plant your favorite vegetable in this field next season, what would it be?
__________________________________
D. What is that vegetable’s nitrogen need? _______ lbs/acre or kg/hectare (circle one)
(Select from table 2.)
Table 2. Typical Nitrogen (N), Needs of Vegetable Crops


Vegetable Crop  (kg/ha) 
 Artichoke  55-110                     Lettuce  135-200
Asparagus  90-165                     Muskmelon  110-165
Bean  65-135                              Onion 135-335
Broccoli  110-225                       Pepper, Chili 90-165
Brussel Sprouts  110-225            Pepper, Sweet  135-270
Cabbage 110-225                       Potato, Irish  165-335
Carrot  90-165                           Potato, Sweet  90-135
Cauliflower  110-225                  Spinach  90-165
Celery225-335                          Squash, Summer  90-165
Corn, Sweet 135-270                Tomato 110-225
Cucumber 90-165                     Tomato, Cherry  110-225
Garlic  110-225                         Watermelon  110-180

Source: FERTILIZER GUIDE FOR CALIFORNIA VEGETABLE CROPS
K. B. Tyler and 0. A. Lorenz, Department of Vegetable Crops, University of California, Davis, 1991
(Available at: http://vric.ucdavis.edu/veginfo/topics/fertilizer/fertguide.html)

E. What percentage of the vegetable crop’s nitrogen need from the soil was potentially
contributed by the cover crop? _________ %


_____________________ ÷ ____________________ X 100 = ____________________

Cover Crop                                  Vegetable’s                                  % Nitrogen Supplied
Nitrogen Contribution                      Nitrogen Need                           to Soil by Cover Crop


Nitrogen cycle.BBC-Bitesize

http://www.bbc.co.uk/schools/gcsebitesize/science/add_gateway_pre_2011/greenworld/recyclingrev2.shtml 

Nitrogen is essential for the formation of amino acids in proteins. The nitrogen cycle is a model that explains how nitrogen is recycled.
There's lot of nitrogen in air – about 78% of the air is nitrogen. Because nitrogen is so unreactive, it cannot be used directly by plants to make protein. Only nitrates are useful to plants, so we are dependent on other processes to convert nitrogen to nitrates in the soil.
Diagram showing the 3 different ways of nitrogen fixation
  1. Nitrogen gas is converted to nitrate compounds by nitrogen-fixing bacteria in soil or root nodules. Lightning also converts nitrogen gas to nitrate compounds. The Haber process converts nitrogen gas into ammonia used in fertilizers. Ammonia is converted to nitrates by nitrifying bacteria in the soil.
  2. Plants absorb nitrates from the soil and use these to build up proteins. The plant may be eaten by an animal, and its biomass used to produce animal protein.
  3. Urea and egested material is broken down by decomposers. This results in nitrogen being returned to the soil as ammonia.
  4. Decomposers also break down the bodies of dead organisms resulting in nitrogen being returned to the soil as ammonia.
  5. In some conditions denitrifying bacteria in the soil break down nitrates and return nitrogen to the air. This is usually in waterlogged soil. Improving drainage reduces this effect, making the soil more fertile.

Cover crops


http://www.motherearthnews.com/organic-gardening/cover-crops-improve-soil-zmaz09onzraw.aspx#axzz3KqFhHfgD


A cover crop is a crop planted primarily to manage soil erosion, soil fertility, soil quality, water, weeds, pests, diseases, biodiversity and wildlife in an agroecosystem (Lu et al. 2000), an ecological system managed and largely shaped by humans across a range of intensities to produce food, feed, or fiber. Currently, not many countries are known for using the cover crop method.
Cover crops are of interest in sustainable agriculture as many of them improve the sustainability of agroecosystem attributes and may also indirectly improve qualities of neighboring natural ecosystems. Farmers choose to grow and manage specific cover crop types based on their own needs and goals, influenced by the biological, environmental, social, cultural, and economic factors of the food system in which farmers operate (Snapp et al. 2005).

Legumes
Legume cover crops can fix nitrogen from the air, supplying nitrogen to the succeeding crop as well as protecting the soil from erosion and adding organic matter. The amount of nitrogen fixed varies between species, although generally, more top growth equals more nitrogen fixed. Some legume species have aggressive tap roots which can break up subsoil compaction, but this requires more than one year’s growth to happen.

How Cover Crops Help

Since the early 1900s, farmers have used cover crops to restore fertility to worn-out land. In addition to helping bulk up soil with organic matter, cover crops prevent erosion, suppress weeds, and create and cycle soilborne nutrients using the power of the sun.
Rhizodeposition is a special advantage to working with cover crops. Many plants actually release sugars and other substances through their roots. They are like little solar engines, pumping energy down into the soil. With vigorous cover crop plants, this process goes on much more deeply than you would ever dig — 6 feet for oats and rye! If you are leaving your garden beds bare in winter, you are missing the chance to use cold-hardy crops such as cereal rye or oats to solar-charge your soil. Thanks to this release of sugars, the root tips of many plants host colonies of helpful microorganisms, and as the roots move deeper, the microbes follow.
But so much for scientific talk. If you’ve experimented with cover crops, perhaps you have dug up young fava beans or alfalfa seedlings to marvel at the nitrogen nodules on their roots. Pull up a marvelous mop of fibrous roots and shake out the soil. What crumb! The soil’s structure is nothing short of amazing! These are the moments an organic gardener lives for.

Friday, November 28, 2014

HOME

http://youtu.be/jqxENMKaeCU


We are living in exceptional times. Scientists tell us that we have 10 years to change the way we live, avert the depletion of natural resources and the catastrophic evolution of the Earth's climate.

Saturday, November 22, 2014

Rosetta’s probe Philae ‘sniffed’ organic matter on comet, scientists say.

http://www.news.com.au/
Touchdown...a combination photo shows Rosetta’s lander Philae after touching down on the
Touchdown...a combination photo shows Rosetta’s lander Philae after touching down on the surface of Comet 67P/Churyumov-Gerasimenko. Picture: AP Photo/Esa/Rosetta/Philae, FILE Source: AP
THE first-ever probe of a comet found traces of organic molecules and a surface much harder than imagined, scientists say.
Robot lab Philae fell asleep on comet 67P/Churyumov-Gerasimenko on Saturday, having run out of on-board battery power after 60 hours of prodding and probing an object zipping towards the Sun at 18 kilometres per second.
The lander control centre in Cologne, operated by German Aerospace Centre (DLR), said Philae had uncovered much about the comet despite a rough touchdown in a less-than-perfect spot.
“We are well on our way to achieving a greater understanding of comets,” said Ekkehard Kuhrt, project scientific director.
“Their surface properties appear to be quite different than was previously thought.”
Philae landed on “67P” last Wednesday after a nailbiting seven-hour descent from Rosetta, its orbiting mothership.
Space ... an image taken by Rosetta’s camera shows the Comet 67P/Churyumov-Gerasimenko fr
Space ... an image taken by Rosetta’s camera shows the Comet 67P/Churyumov-Gerasimenko from a distance of 285km. Picture: AFP / ESA/Rosetta/MPS for OSIRIS Team Source: Supplied
Rosetta had travelled more than a decade and 6.5 billion kilometres to meet up with the comet in August this year.
The touchdown 510 million kilometres from Earth did not go entirely as planned, when Philae’s duo of anchoring harpoons failed to deploy and it bounced twice before ending up in a crevice, which left its solar panels shadowed from the sunlight needed to power its batteries.
The DLR said the MUPUS probe, one of Philae’s 10 on-board science instruments, hammered into the comet to discover it was “a tough nut to crack”.
Electric and acoustic experiments confirmed the comet was “not nearly as soft and fluffy as it was believed to be” underneath a surface layer of dust.
Journey ... A combination image of enlarged photographs released by the ESA shows the jou
Journey ... A combination image of enlarged photographs released by the ESA shows the journey of Rosetta’s Philae lander as it approached and then rebounded from its first touchdown on the comet. Picture: AP Source: AP
The team said Philae’s COSAC gas analyser managed to “sniff’ the atmosphere and detect the first organic molecules” shortly after landing.
Some astrophysicists theorise that comets “seeded” our fledgling planet with the beginnings of life-giving water and organic molecules, and hoped that analysis of “67P” would prove this.
“Analysis of the spectra and the identification of the molecules are continuing,” said the statement.
Project manager Stephan Ulamec said he was confident Philae would make contact later “and that we will be able to operate the instruments again” as the comet moves closer to the Sun

ScienceCasts: How to Land on a Comet

Tuesday, November 18, 2014

Hubble Site

http://hubblesite.org/the_telescope/hand-held_hubble/

                     
Hubble Floating Above Earth
Since the earliest days of astronomy, since the time of Galileo, astronomers have shared a single goal — to see more, see farther, see deeper.
 
  The Hubble Space Telescope's launch in 1990 sped humanity to one of its greatest advances in that journey. Hubble is a telescope that orbits Earth. Its position above the atmosphere, which distorts and blocks the light that reaches our planet, gives it a view of the universe that typically far surpasses that of ground-based telescopes.
Hubble is one of NASA's most successful and long-lasting science missions. It has beamed hundreds of thousands of images back to Earth, shedding light on many of the great mysteries of astronomy. Its gaze has helped determine the age of the universe, the identity of quasars, and the existence of dark energy.

 http://hubblesite.org/gallery/album/    
 PICTURE ALBUM View an expansive collection of Hubble images: planets, stars, nebulae, galaxies and more. Picture Album spreads the universe out before you in all its dazzling complexity.


PVC Model exampleMake a scale model of NASA’s Hubble Space Telescope using easy-to-find supplies and the printable materials.
These models aren’t working telescopes – you can’t peer at the sky with them. But they can give you an up-close look at the telescope’s structure and a challenging project to engage your model-making skills.


Sunday, November 16, 2014

Into The Universe With Stephen Hawking The Story of Everything


 Please answer the following questions:
 1. What is the title of the video?
 2. Doing what Stephen Hawking spends much of his time?
 3. Where every single piece of matter found on planet Earth was made?
 4. How old look the galaxies from planet Earth?
 5. What is the principle that explains the apparent change in the pitch of the sound of the car?
 6. When the Big Ban occurred?
 7. What happen every moment after the Big Bang?
 8. What happens when matter and antimatter make contact?
 9. How many galaxies are there in the visible universe?
10. What discovery Hawking and other scientists made in 1982?
11. Where in the early universe the stars and galaxies started to form?
12. What is a remarkable property of hydrogen?
13. The fusion of hydrogen atoms produces what new element?
14. The energy which allows people do work and survive is coming from where?
15. What is the last element form in some stars before they explode?
16. What is the name given to exploding stars?
17. How old is the Milky Way galaxy?
18. What is the dark side of gravity according to Hawking?
19. From what size to what size a star collapse into a black hole?
20. What discovery about the color of black holes was made by Hawking?
21. What is the size of a small black hole?
22. When after the Big Bang, we have stars and galaxies with supermassive black holes?
23. What chemical elements are found in stardust?
24. Which planets are the rocky planets?
25. What people don't know today about our planet?
26. When people appeared on planet Earth?
27. What is one reason Hawking loves cosmology?
28. What is Apophis?
29. When Apophis will be located the nearest to planet Earth?
30. Why Hawking says that intelligence is not always beneficial for the survival of the human species?
31. How often a supernova explosion occurs in the Milky Way galaxy?
32. How far away from Earth there is a star than could produce a dangerous gamma ray burst?
33. How long ago scientists believe the Earth was hit by a gamma ray burst?
34. When people landed on the moon for the first time?
35. What the robots sent to Mars show about the planet?
36. What may be a serious problem for the astronauts that live in Mars for long periods of time?
37. How Mars could be changed to make it more suitable for humans?
38. How much hotter the sun becomes every billion years?
39. How many times bigger the sun will grow in about seven billion years?
40. In what way Gliese 581d may ne very beneficial to humans?
41. What spacecraft traveled to several planets in our solar system?
42. What types of energy engineers believe future spacecrafts will use?
43. What technology will be able to do in about 1,000 years according to Hawking?
44. What is to Hawking the ultimate mystery about the universe?
45. What will happen to the atoms that today make our bodies?
46. What important question Hawking asks the viewer?
47. According to Hawking, the fate of the universe depends on the behavior of what?
48. If there is a Big Crunch, when another Big Bang might occur?

Stephen Hawking - The Big Bang

Stephen Hawking - Black Hole Time Travel

Stephen Hawking - The Birth of Stars

Stephen Hawking - Supernovas

Stephen Hawking - Formation of the Solar System

Stephen Hawking - Formation of the Solar System

The History of Earth


The History of Earth
1.   1   How did Earth form?           2.     How old is Earth?  3.      How did the moon form?  4.      Where did Earth’s water come from?  5.      Name one reason life was impossible on early Earth.  6.      Where is life suggested to have begun?  7.      What was the only type of life on the planet for hundreds of millions of years?  8.      What important gas did stromatolites (cyanobacteria) release into the atmosphere?  9.      What happened during the Cambrian Explosion?  10.   Describe the first land plants.  11.   What was special about Tiktaalik?  12.   Why were insects so big hundreds of millions of years ago?  13.   Why are eggs important?  14.   What was the name of the supercontinent 200,000,000 years ago?  15.   What did dinosaurs evolve from?  16.   What is oil made of?  17.   What caused dinosaurs to go extinct?  18.   How long ago did dinosaurs go extinct?  19.   How did mammals survive this mass extinction?  20.On which continent did humans evolve?

Earth's Oldest Crust Dates to 4.4 Billion Years Ago


A photo of the oldest bit of earth crust.
Zircon crystals from the Jack Hills of Australia, like the one above, reveal that continents arose just 160 million years after our solar system formed, much earlier than previously thought.
PHOTOGRAPH BY JOHN VALLEY, UNIVERSITY OF WISCONSIN-MADISON

Sunday, November 2, 2014

Birthday Stars. What's this all about?

Click here to find your birthday star: http://outreach.jach.hawaii.edu/birthstars/

Light travelling in empty space is the fastest thing in the universe. It travels at 186,000 miles per second!
The stars are so far away from us that their light still takes a long time to reach Earth. One light year is the distance light travels in a year: 5,878,499,812,499 miles. The closest star apart from the Sun is 4.2 light years away, so its light takes 4.2 years to reach Earth.
Tell the Birthday Stars computer when you were born, and it will look for a star that is your age in light years away from Earth. This means that the light we're seeing from that star today actually left the star around when you were born, and has taken your entire life to reach Earth.
From month to month you may see your birthday star changing. This is because as you get older the light from more and more distant stars has had the time to travel to Earth in during your life.

Designed by the Joint Astronomy Centre, using some data from the Yale Bright Star Catalog and the NStars project. JAC Images

7 most common and poisonous plants in gardens


The Castor oil plant – Ricinus communis

"Castor oil plant - Ricinus communis"
The Castor oil plant is found all over the Mediterranean region and is particularly toxic to humans and animals. All parts of the plant are dangerous. However, the flowers at the top contain little pods, there are three seeds within each pod, these seeds are particularly lethal, containing high concentrations of Ricin.
According to the Guinness Book of World Records (1997 edition) this plant is the most poisonous in the world.

Angel’s Trumpets – Datura

"Angel’s Trumpets - Datura"
Another common sight across Spain are Angel’s Trumpets, commonly known as Datura. A beautiful plant with white or pink flowers.
The seeds and leaves are the most toxic part, although, most parts of the plants contain toxics.
Datura plants contain tropane alkaloids, children are particularly vulnerable to this kind of poison and the prognosis is often fatal.

The Calla Lily – Zantedeschia

"Calla Lily - Zantedeschia"
A very common plant found throughout the Mediterranean and all over Spain. Originally from South Africa. It is an exceptional beautiful plant that flowers in late winter or early Spring, then dies down until the following year.
Its leaves are toxic. When in contact with skin, eyes or lips will cause a nasty burn or irritation.

Adelfa – Nerium oleander

"Adelfa - Nerium oleander"
Being particular drought resistant, Adelfa is found throughout Spain.
The flowers can be red, white, pink or yellow. All parts of the plant are highly toxic and particular care should be taken when pruning as the sap is particularly dangerous.

Wisteria - Fabaceae

"Wisteria - Fabaceae"
Extremely popular as ornamental plants across Asia, Wisteria is ideally suited to the Mediterranean climate. All parts of the plant are toxic if consumed, but, the pods and the seeds are the most dangerous parts.

Lantana – Verbenaceae

"Lantana - Verbenaceae"
The Lantana plants are drought resistant and extremely colourful, with a mix of orange, red, yellow, blue and white florets.
The berries and leaves are toxic. Less so, than some of the other plants listed above. But they are still classified as hepatogenic.

Poinsettia – Euphorbia pulcherrima

"Poinsettia - Euphorbia pulcherrima"
Known across Spain as the ‘Estrella de Navidad – Christmas Star,’ no Spanish home is complete without one over Christmas time.
All parts of the plant are mildly toxic with white sap being slightly more dangerous.

 http://www.spain-holiday.com/blog/7-most-common-and-poisonous-plants-in-your-spanish-garden.php

Saturday, November 1, 2014

The Biggest Stars In The Universe

Geocentric and Heliocentric models.


The geocentric model was developed thousands of years ago by Greek philosophers and was the accepted model of the Solar System for centuries. Geocentric actually means earth centered. This model is also called the Ptolemaic system in honor of the Greek scientist and philosopher Claudius Ptolemy, although the thory was around years before him. The geocentric model places the Earth at the center of the universe with the Sun, Moon, stars, and planets circling it.

 The heliocentric model, which means sun centered, gradually replaced the geocentric model. This new system places the Sun at the center of the Solar System with the Earth and all the other planets orbiting it. This theory revolutionized everything because it reversed centuries of established opinion. Although the idea of a heliocentric model had been around as early as 200 B.C., it did not gain popularity until the 16th century.

Thursday, October 23, 2014

Biodiversity


Author: Tricia Edgar
What’s going on in your garden? Study different areas of your backyard to see which is the most diverse.

Problem:

Compare the biodiversity in a square of lawn, forest, and home garden. Which one has the largest variety of plants and animals?

Materials:

  • 4 1-foot long pieces of 1"x2" wood
  • Four nails
  • Hammer
  • Clothespin
  • Safety goggles
  • Margarine container or other small plastic container
  • Plant identification book
  • Insect identification book
  • Notebook and pencil

Procedure:

Can you see biodiversity? In this experiment, you’ll make a square and see if you can determine what areas have the most plant and animal diversity.
1.    First, get your nails, hammer, and wood. Find an adult to help you if you need it. Arrange the pieces of wood in a square with the edges overlapping.  Place a nail in each corner to attach the wood together. This is your biodiversity square.
2.    Now, choose three different sites: a garden, a forest (or other wild place) and a piece of lawn.
3.    Create a hypothesis, your best guess about what is going to happen. Which environment will present the most biodiversity: the garden, the wild place, or the lawn? Why?
4.    To keep things random, stand in the middle of each site and throw the clothespin into the air. Wherever it lands will be the middle of the place you will study.
5.    Place your square in the first environment. Take a close look at the environment. What plants are living there? If you can’t identify them, look them up in your plant book. What animals are living there? Generally, these will be tiny animals such as insects. Look them up in your insect book. Can you see evidence of other animals, such as tracks, bite marks, or scat (animal poo)?  Write all of your observations down in your notebook.
6.    Do the same thing in each of the three environments. Which one has the highest number of different sorts of animals? Which one has the highest diversity of plants? Why?
Results: Depending on the particular square you choose, the forest or garden environment will have the most biodiversity.

Why?

What did you see in your square?
Lawn environments are mostly grass, although they may contain a weed or two. They are not very diverse environments.
Garden environments are as diverse as people make them, and part of what you’ll see will depend on where your clothespin landed. If it landed on a densely-planted area, you may have found the most diversity in this square, especially if that square included a plant that attracts many useful insects.
One of the challenges of this experiment is accurately gauging an area’s biodiversity. This can be hard, because it can be difficult to identify all of the different plants and animals that are in your square. It can also be hard because it’s difficult to decide how deep you should search! Biodiversity occurs at all levels, from huge trees to microscopic creatures in the soil. It’s likely that the forest or natural environment has the most biodiversity, but proving this would require a microscope. Forests and other natural environments have a large amount of microscopic fungi, invertebrates, and soil bacteria that help keep the underground ecosystem running.
To do this experiment well, you’d repeat it over and over until you got a lot of information from many different squares. This would allow you to more completely understand the diverse plants and animals in each area. Go back to each place you studied and do the experiment a few more times. How did this influence your results?

Project: the antioxidant mistery.

http://www.odec.ca/projects/2006/haki6a2/

Conducting Reference Toxicity Tests with Lettuce Seeds

http://ei.cornell.edu/toxicology/bioassays/lettuce/default.html

The idea behind a reference toxicity test is that the test organism, in this case lettuce seeds, will respond in a predictable manner to varying concentrations of a particular chemical compound. At some threshold concentration, all of the test organisms will be killed (or in this case, none of the lettuce seeds will sprout). In solutions that are more dilute, some level of inhibition will occur in seed germination and/or radicle length. If the concentration is low enough, no response will be detectable.
This is called a dose/response experiment. You vary the dose of a selected compound, then measure the response of the bioassay organism.
Using NaCl
In order to determine whether lettuce seeds provide a good bioassay for salt toxicity, you can conduct a reference test using known concentrations of NaCl (table salt).
First, make a 0.2M NaCl solution by mixing 11.69 g NaCl with enough deionized water to make 1 liter.
Second, label a series of beakers with the following concentrations: 0.2M, 0.1M, 0.075M, 0.05M, and 0.025M. Make up these concentrations from the 0.02M solution using the proportions listed in the following table:
 
  Concentration
  0.2 M NaCl (mL)
  Deionized Water (mL)
 0.2 M NaCl
 100.0
 0
 0.1 M NaCl
 50.0
 50.0
 0.075 M NaCl
 37.5
 62.5
 0.050 M NaCl
 25.0
 75.0
 0.025 M NaCl
 12.5
 87.5
 Control
 0
 100.0
1. Treat the lettuce seeds in a 10% bleach solution for 20 minutes, then rinse five times with deionized or distilled water. This kills fungal spores that can interfere with seed germination. Note: Tap water can be used if you do not have access to deionized or distilled water, but it will introduce more variability into your experiment because of the varied minerals and other compounds it contains.
2. In each of 18 9-cm petri dishes, place a 7.5-cm paper filter. Label the dishes according to the first column in the following table. Note: Absorbent paper towels or coffee filters can be substituted for the filter paper, as long as they are first shown to be be nontoxic. (Bleached paper may contain dyes or chlorine.)
3. To each petri dish, add 2 ml of the appropriate test solution. In the control dishes, use deionized water as your test solution.
4. To each dish, add 5 lettuce seeds, spaced evenly on the filter paper so that they do not touch each other or the sides of the dish.
5. Place the dishes in a plastic bag and seal it to retain moisture. Incubate the seeds in the dark at constant temperature (preferably 24.5 degrees C) for 5 days (120 hours).
6. At the end of this time, count how many seeds in each dish have germinated, and measure the root length of each to the nearest mm. Look carefully at the plants to make sure you are measuring just the root, not the shoot as well.
Using Other Compounds
To be useful, a bioassay must be sensitive to the types of compound you are interested in evaluating. For example, if you are worried about herbicide contamination of ponds or streams, a bioassay based on seed germination might prove to be more sensitive than one based on death of fish or invertebrates. On the other hand, fish are likely to be much more sensitive than seeds to a compound that is a nerve toxin, for example.
To determine the sensitivity of an organism to a chemical compound, scientists carry out reference toxicity tests. To do this, you measure the response of the organism to a wide range of concentrations of the selected chemical. What concentrations should you use? That of course depends on both the bioassay organism and the chemical being tested. You might want to start by searching through published student reports included on this web site to see whether anyone else has already generated data that would be of use to you.
Before scientists begin an experiment, usually they search through published scientific literature for papers that relate to the procedure they have in mind. If you have access to scientific journals, it would be a good idea to look for papers that report bioassays using the organism and compound you are interested in (see References for example papers). This is a good way to get an idea about an appropriate range of concentrations.
If you can't find any appropriate data, that's ok -- you'll just have to start with a broader range of concentrations to make sure you hit the range that your test organism responds to. (With too high a concentration, the test organisms will all die, or in the case of seeds, none will sprout. With too low a concentration, you will not be able to detect any difference between your samples and your control.) Ideally, you want to test concentrations that cover both of these endpoints plus a range of concentrations in between. Then you will be able to conclude whether your test organism responds in a predictable way to the compound you are testing.
Serial dilutions are one way to set up a broad range of concentrations. For example, suppose you suspect that in a 100 mg/L solution of a selected compound, no lettuce seeds will sprout, and you are interested in narrowing this down to find out the range of concentrations in which germination will occur. You might decide to start with a 10-fold dilution series, testing solutions of 100, 10, 1, 0.1 and 0.01 mg/L. Another possibilitity would be a dilution series in which each solution is half the strength of the previous solution in the series: 100, 50, 25, 12.5, and 6.25 mg/L.
Once you have collected data using an initial set of concentrations, you may find that it would be useful to carry out a follow-up experiment using a more narrow set of concentrations. For example, if none of the seeds sprout at one concentration in your series, and all of them sprout at the next level of dilution, it would make sense to carry out a dilution series between these two concentrations in order to further define the sensitivity of lettuce seeds to your selected compound.


Taking Measurements
At the end of the 5-day growth period, count and record how many seeds in each dish have germinated.
For each sprout, measure the radicle length to the nearest mm. (The radicle is the embryonic root).
Look carefully at the plants to make sure you are measuring just the radicle, not the shoot as well. For example, in the picture below, you would measure just the part between the two arrows, not the shoot and cotelydons to the left.
Measuring the lettuce seedling radicle image
 
How Good are Your Data?
Once you have counted how many seeds germinated, and measured their radicle lengths, then what? How can you interpret these results?
Comparison to the Control
The first thing to check is your control (the dishes that contain deionized or distilled water rather than a sample). The purpose of the control is to identify how well the seeds will grow without any added contaminants. Would you expect all of the seeds in your control dishes to germinate? Probably not, just like a gardener does not expect all the seeds in a garden to sprout.
If fewer than 80% of the seeds in your control dishes sprouted, something may have gone wrong in your experiment. Perhaps the seeds were too old or stored improperly, so they were no longer viable. Or maybe something went wrong with the conditions for growth. Did the dishes get too hot, too dry, or contaminated in some way? Did you use tap water for your control, rather than deionized or distilled water? In many cases this works fine, but since tap water is highly variable from source to source, it gives less predictable results.
A Look at Variability
Within each treatment, how much variability did you find in your results? Did the replicate dishes show similar numbers of seeds sprouting, and similar average radicle lengths? If you think the data are much more variable than you would expect, you might want to explore the potential sources of variability for this type of experiment.

Sunday, October 19, 2014

FERTILIZERS

 http://www.sciencebuddies.org/science-fair-projects/project_ideas/EnvSci_p017.shtml

Abstract

Did you know that when you use fertilizer in your garden, it can eventually reach a lake, stream, or pond? There are many different chemicals present in fertilizers. How will they affect the aquatic organisms in the ecosystem? In this science project you will get to find out!

Objective

Test the effects of liquid fertilizer on an aquatic environment containing small aquatic animals and plants.

Introduction

Fertilizers are chemicals that are added to the soil to increase the growth of plants in yards, gardens, or large agricultural facilities. The effect on crops can be increased growth, but fertilizers can have a negative impact on surrounding organisms in the soil.
When a heavily fertilized field is irrigated, excess water can flow along the surface of the land and pick up the fertilizers. This is known as surface runoff. The fertilizer-rich surface runoff can directly flow into nearby streams, lakes, or ponds, like the one shown in Figure 1, below. Additionally, chemicals present in the fertilizer can also infiltrate the ground water system and contaminate it. This polluted ground water can also make its way into nearby ponds, streams, or lakes. What happens to the aquatic organisms that are present in the environment when chemical fertilizers are present? How do the fertilizers affect the organisms' ecosystem?
A pond
Figure 1. How are the organisms in aquatic environments, like this pond shown here, affected by the chemicals from fertilizers?
In this science project you will test the effect of liquid fertilizer on an aquatic environment. Each aquatic environment will be a mixture of small aquatic plants and animals. By adding different brands of fertilizer, you can test how they affect the environment. Which fertilizers are the best choice for the environment?

Terms and Concepts

  • Fertilizers
  • Surface runoff
  • Ground water
  • Contamination
  • Ground water pollution
  • Ecosystem

Questions

  • How will fertilizer affect an aquatic environment?
  • Will all of the organisms be affected similarly or differently?
  • Which brand(s) of fertilizer will cause an effect?
  • Are organic fertilizers less toxic to aquatic ecosystems? 

Materials and Equipment 

100 mL graduated cylinder. Alternatively, a metric measuring cup may be used.
  • pH test strips
  • Small aquatic animals, such as small pond snails. 
  • Small aquatic plants, such as duckweed or Elodea (at least 40 if you are using smaller plants, like duckweed, or at least 12 if you are using larger plants, like Elodea). Pick one or two different types. Alternatively, these may be available from aquarium supply stores, ponds, or plant nurseries.
You will also need to gather these items:
  • Large, sealable, reusable plastic containers with lids, e.g., Glad or Zip-lock (4). These should each hold at least 1400 mL, or about 6 cups.
  • Permanent marker for labeling
  • Distilled water (2 gal.). This is available in most grocery stores.
  • Different brands of liquid fertilizer (3). You can find these at plant nurseries, the plant section of a hardware store. These may also be called "plant food," but you will want to confirm with a sales person at the store that these are also considered fertilizers.
  • Lab notebook

Experimental Procedure

  1. Rinse each container thoroughly with water. Do not use soap because it can coat the plastic container and may be harmful to the organisms in your experiment.
  2. Assign a number (from 1 to 3) to each fertilizer you use. Use a permanent marker to label the fertilizers' bottles, or just write the numbers you assigned in your lab notebook.
  3. Label each container "1," "2," or "3" with a permanent marker. Also label one container "Control."
  4. In your lab notebook, make a data table like Table 1, to record your data in.
  5. Use a graduated cylinder or metric measuring cup to prepare the solutions for each container according to Table 1. Prepare one container for each fertilizer, making sure the numbers on the containers match the ones you assigned to the fertilizers. In the container you labeled "Control," only fill it with distilled water, but no fertilizer, since it is your positive control. Use bottled distilled water, not tap water, because tap water may contain chemicals, like chlorine or chloramine, harmful to aquatic life.
Fertilizer Number Amount of Water
(mL)
Amount of Fertilizer
(mL)
Total Volume
(mL)
pH Observations
1 975 mL 25 mL 1000 mL    
2 975 mL 25 mL 1000 mL    
3 975 mL 25 mL 1000 mL    
Control (distilled water only) 1000 mL 0 mL 1000 mL    
Table 1. Prepare your containers based on this data table. You will want to prepare one container for each experimental fertilizer group, and one container that only has distilled water in it (and no fertilizer) for your control. The amounts of water and fertilizer needed are given in milliliters (mL).
  1. Check the pH of each container with your pH test strips and record the data in your data table. Also record any observations about the fertilizer or container you put it in.
  2. Evenly distribute the aquatic animals into each container, putting at least 5 into each container. If you are using more than one type of animal, make sure there is the same number of each animal type in each container.
    1. If you are using Daphnia, you can use a watering pipet or medicine dropper to move them from one container to another.
  3. Put 3 to 10 plants into each container, depending on the size of the plant.
    1. For example, if you are using small duckweed plants, 10 is a good amount, while if you are using the larger Elodea plants, 3 plants in each container is a better amount.
    2. If you are using duckweed, make sure that each plant has a stem (the part sticking down).
    3. If you are using large Elodea plants, you can carefully cut them into smaller pieces, about one or two inches long, so it is easier to count their leaves.
  4. In your lab notebook, make data tables like Table 2 and Table 3. In Table 2, write down the total number of animals in each container. In Table 3, write down the total number of plant leaves in each container.
    1. Note: If you are using more than one type of animal or plant, you can make another data table like Table 2 or Table 3 and separately record each type of animal or plant in its own data table.
  5. Each day, for five days, write down your observations in your data tables. Specifically, count and write down the total number of animals that are alive in each container, and the total number of plant leaves in each container.
Fertilizer Number Number of Animals Living
Day 1 Day 2 Day 3 Day 4 Day 5
1          
2          
3          
Control (distilled water only)                                              
Table 2. Each day, write down the total number of animals alive in each container. Note: If you are using more than one type of animal, you can make a second data table like this one and record each type of animal in their own data table. Put the name of the animal type in the title of the data table.

Fertilizer Number Number of Leaves on Plants
Day 1 Day 2 Day 3 Day 4 Day 5
1          
2          
3          
Control (distilled water only)          
Table 3. Each day, write down the total number of leaves in each container. Note: If you are using more than one type of plant, you can make a second data table like this one and record each type of plant in their own data table. Be sure to correctly title the data tables.
  1. Graph your results.
    1. You can make line graphs by hand or on a computer using a program like Create a Graph and then print the graphs out.
    2. Make one line graph that shows the number of animals living in each container over time. On the horizontal axis (x-axis) put the time (in days). On the vertical axis (y-axis) put the number of animals living. Make a line for each container you tested, including the control.
      1. Note: If you tested more than one type of animal, you can make a separate graph for each animal type.
    3. Make one line graph that shows the number of plant leaves in each container over time. On the x-axis put the time and on the y-axis put the number of plant leaves. Make a line for each container you tested, including the control.
      1. Note: If you tested more than one type of plant, you can make a separate graph for each plant type.
  2. Analyze your results and see if you can draw conclusions about how the different fertilizers affected the animals and plants.
    1. Did one type of fertilizer affect the animals more than another type of fertilizer? What about the plants?
    2. Did the animals and plants respond similarly or differently to the fertilizers?
    3. Overall, which seemed to be the least toxic? Which seemed to be the most toxic?

Sustainable Gardening This one is for you, Pepe !